woohooooo!!! can't wait to get mine!

Showing posts with label xr200. Show all posts

Friday, November 13, 2015

DIY: Honda XR200 Starter overhaul

My bike doesn't have a kickstart but other year model does.. so knowing issues caused by your bike starter is very essential.

Flowchart to diagnose if its the starter causing the problem:

********************flowchart will follow******************

Points of failure:
-stuck contact brushes due to dirt
-carbon brush: no contact to the armature due to wear
-cut-off wire from the carbon brush
-shorted armature windings > thank God I haven't experienced this

HEADS-UP
In my case since I did some rewiring due to battery relocation. I was able experience an issue where there wasn't enough current going to the starter. I noticed this after following my usual checks (follow flowchart). After that experience, I installed a LED that lights up when there is steady flow of current while pressing on the starter switch.

**************************PICTURE WILL FOLLOW****************

How to dismantle starter:


 In order to gain access to the starter, we have to remove the bike exhaust.


We then take off 2 bolts holding down the starter and the (+) wire from the battery.

Using a 7mm wrench open 2 bolts from the starter. Extra careful on the O-rings, these can break depending on age but can easily be replaced with replacement parts using other starters of similar size

Just take photos if your not too comfortable in taking stuff apart.


At this point, it is now the best part to do visual inspection if you have worn brushes or you are with a broken wires. After inspection, its would also be the best time to clean the contacts and everything inside. Do not expose O-rings to chemicals that would damage it. I suggest using CARB Cleaner, its fast acting on grease and dries quickly. You can also take the contacts off of the guides after getting those nasty coil springs.

Use logic to put everything together. Remember that the bolt going thru the hole for the (+) wire to the battery should not by any means make contact the starter housing or else you will short circuit it. 

Hope this helps:)


Thursday, November 12, 2015

engine sprocket change for XR200...

the first time I experienced this problem was 3 yrs ago, we were on our way home from my grandparents place; Bogo, Cebu. As we were cruising barangay Sogod... all of a sudden my bike
isn't responding to my gas.. revved up the gas and changed the gear... nothing happened.. since it was almost dark we decided to just pull the bike home using another bike... 

To make the story short.. it wasn't really engine related.. it was just the engine sprocket got eaten by the engineshaft.. I hope you know what I mean!

For the past 3 years, this happened to me few times and another 1 just last week. For this post I will just be showing easy to do this with the right tools and spare parts.

I got everything prepared for this operation: got my spare 14T engine sprocket from Reliance Motors Lapu Lapu City; 24mm open Wrench; 10mm ratchet wrench; 


Lets do this quick: I had to make access to the engine sprocket area so I have to open the engine sprocket access area. Loosen the rear tire to get the chain loose... see pics as reference.


Next step would be to loosen the 2 bolts holding that thing locking the engine sprocket in place.


After taking the parts apart, I noticed that the engine sprocket didn't wear as much as it did before. Checked the drive shaft and it looks good too.. I then turn to the last possible culprit.


Good thing after experiencing similar problem before. I was able to bring with me spare parts.


So took the old engine sprocket out and put everything back in.. now I'm ready to roll!

Here's the pic of the old engine sprocket.

Thanks... hope this helps! 


Tuesday, November 18, 2014

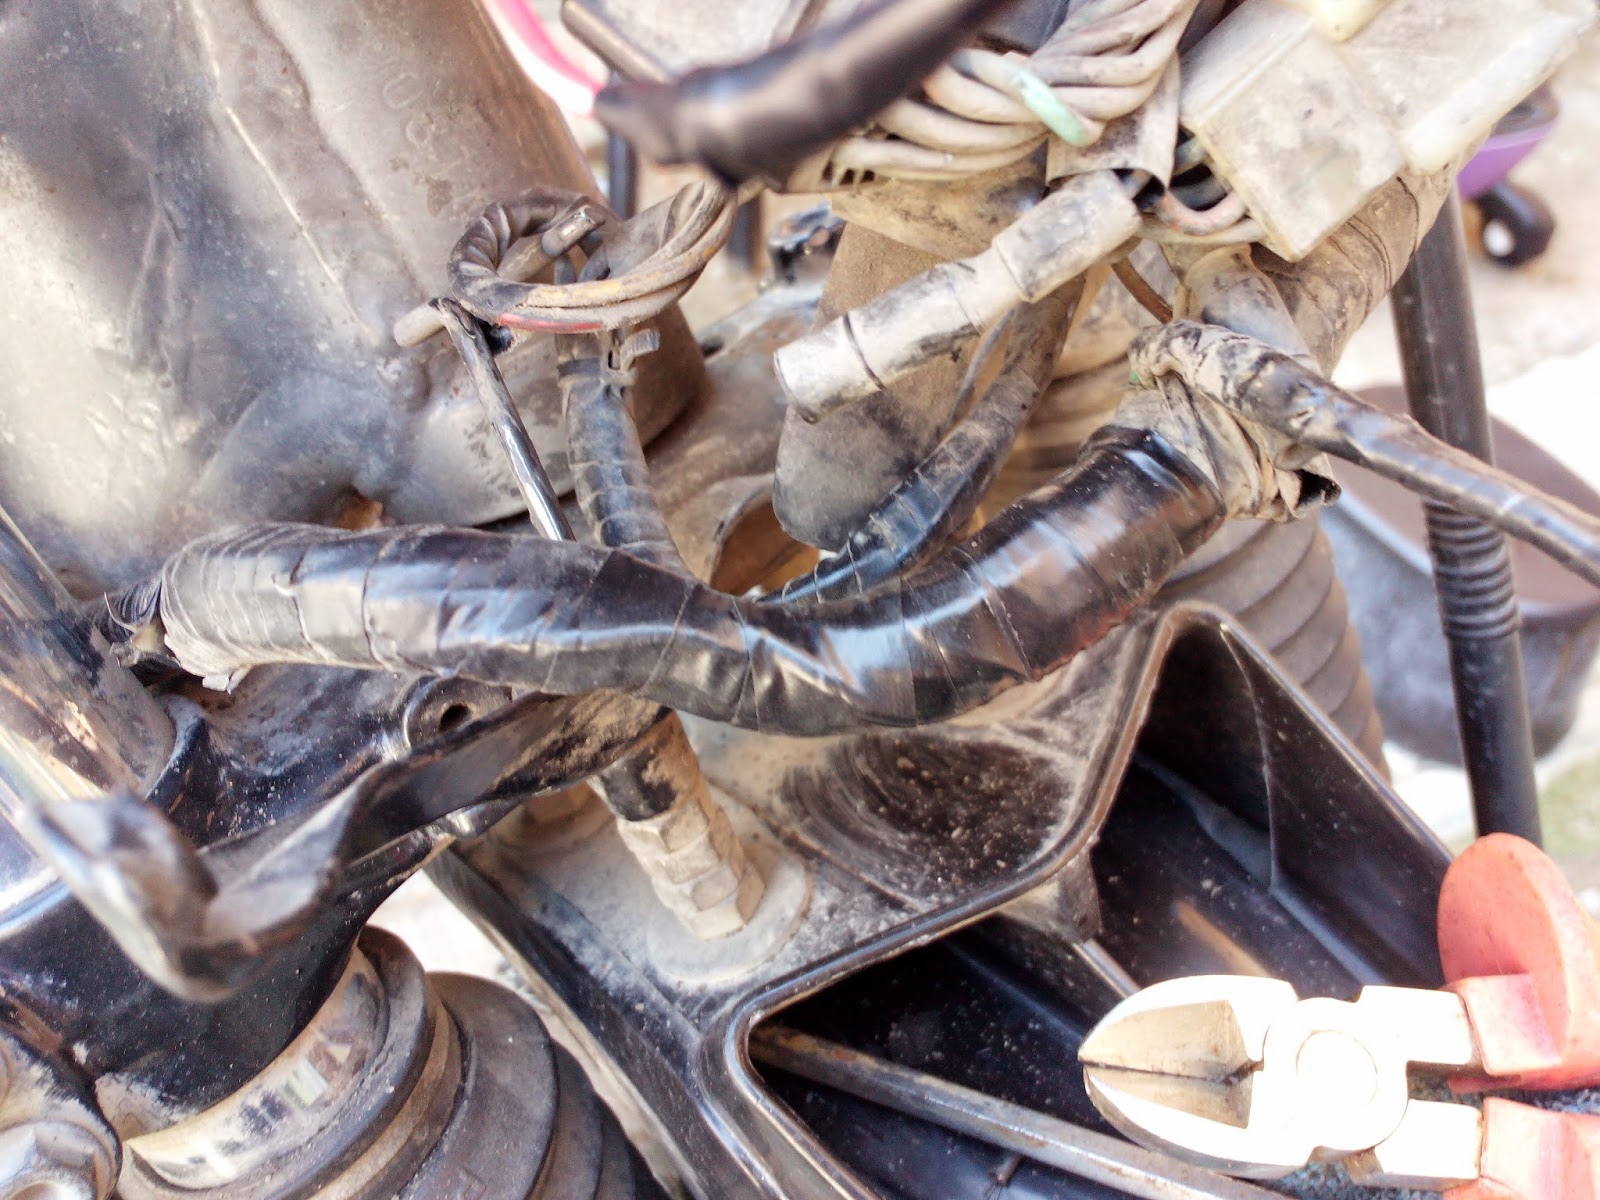
electrical taping exposed wires on my XR200

So i got 3 days off this week, so I thought of fixing my motorcycles ignition... The job was really easy but it got pretty tough because of my little assistant that keeps on jumping at my back while soldering..

After connecting the ignition wires I saw few exposed cables. I have an old XR200 Honda so this was a by product of age and abuse:).. so electrical taping is essential to avoid short circuits.

Here are some tips I learned from an old buddy who works at CFG Banilad. Same technique was also used by another electrician who rewired my bike when I tore it down few years back.

Picture below is quite simple to understand:) So what you need is to transfer or roll the electrical tape to another smaller roll:)


I use 3M Electrical Tapes all the time:)


Sample 1.
comes handy when insulating wires too:)


Sample 2.


this is the bikes main harness.. take the  old tape and re-tape


Sample 3.


Advantage of using this practice is that you avoid the annoying thing that happens when you cut the tape first then tape.. yup! it sticks anywhere.. when this happens the tapes sticky part would accumulate dust.. Hope this helps!

Daddy's advise when working with little kiddo's is to do a visual check before using them bikes.. You might have some toothbrush stuck somewhere...


Lazada Philippines